 English
 Bahasa
To change the app icon in Android Studio, follow these steps:
1. Prepare Your Icon
- Format: Your icon should be in PNG format with a transparent background.
- Size: You will need multiple versions of your icon in different resolutions (for different screen densities:
mdpi,hdpi,xhdpi,xxhdpi,xxxhdpi):mdpi(48x48 pixels)hdpi(72x72 pixels)xhdpi(96x96 pixels)xxhdpi(144x144 pixels)xxxhdpi(192x192 pixels)
2. Locate the res Folder
- In Android Studio, go to the Project view (on the left sidebar).
- Navigate to the
resfolder in the directory tree:app/src/main/res/ - Inside the
resfolder, you'll find the following directories:mipmap-mdpimipmap-hdpimipmap-xhdpimipmap-xxhdpimipmap-xxxhdpi
3. Replace the Current Icons
- Inside each of these
mipmap-folders, you'll find the current app icons (e.g.,ic_launcher.pngandic_launcher_round.png). - Replace each of these icons with your newly prepared icons. Make sure the icon names match the originals (
ic_launcher.pngandic_launcher_round.png).- Note: You may have both a default square (
ic_launcher.png) and round icon (ic_launcher_round.png). Ensure you replace both, or only one depending on your design.
- Note: You may have both a default square (
4. Update the AndroidManifest.xml (if necessary)
- If you want to customize or verify the icon being used, open the
AndroidManifest.xmlfile located inapp/src/main/and check the following line: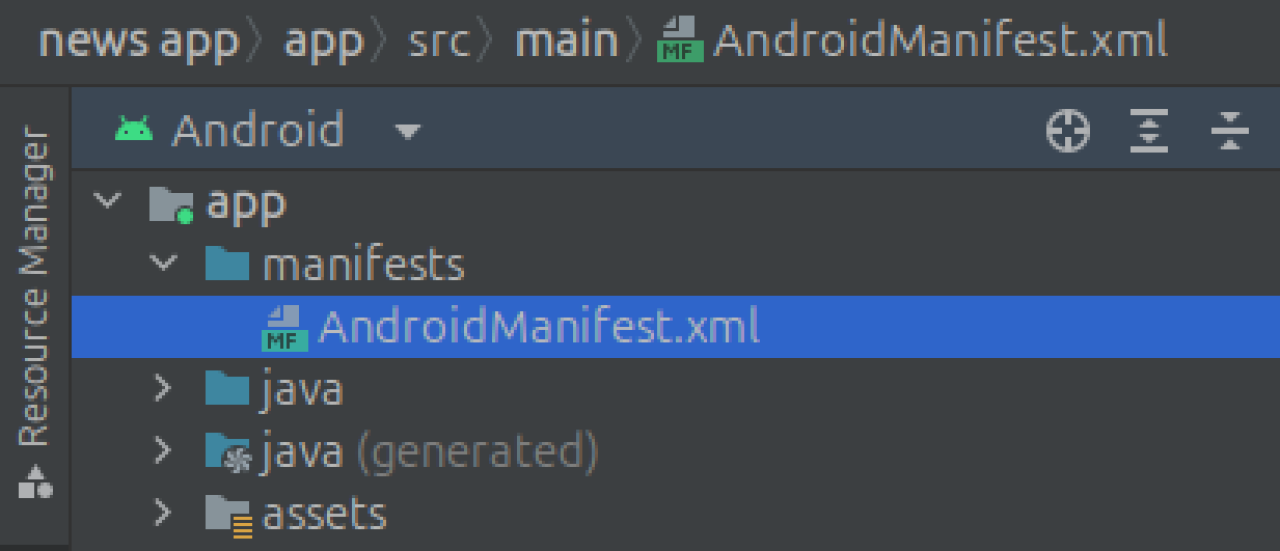
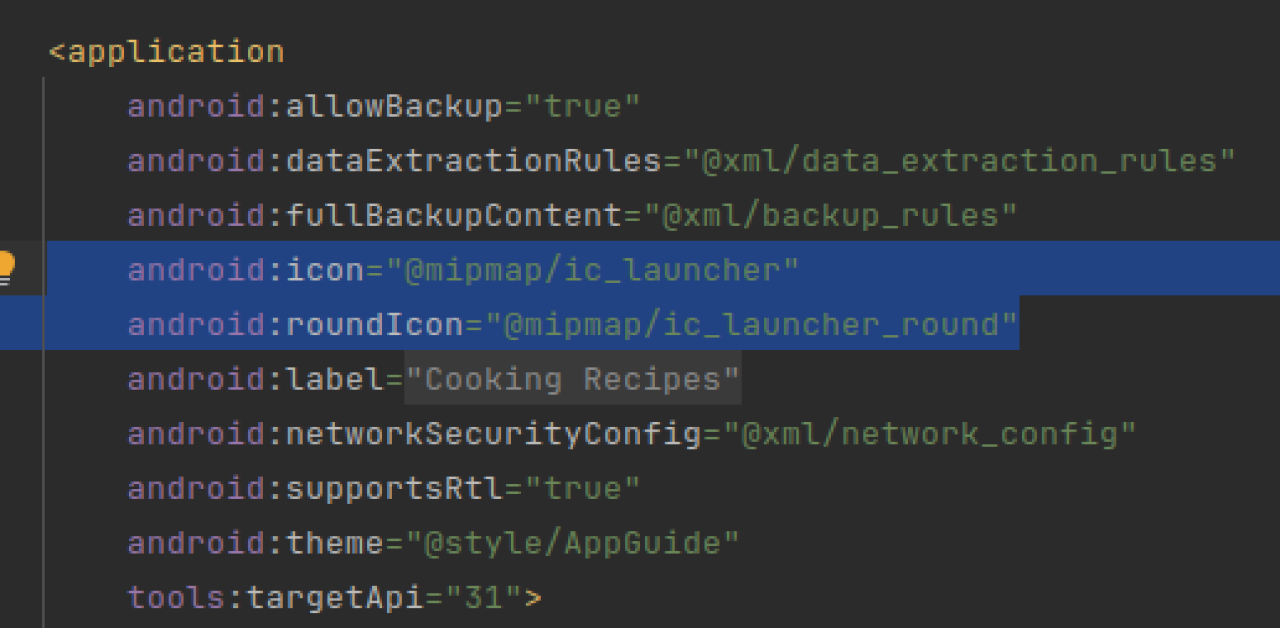
-
Ensure that the
android:iconandandroid:roundIconattributes reference the correct launcher icons.
5. Generate Icons Using Asset Studio (Optional)
If you don't have different resolutions of the icons, you can use Android Studio's built-in Image Asset Studio to generate them:
- Right-click on the
resfolder in Project view.
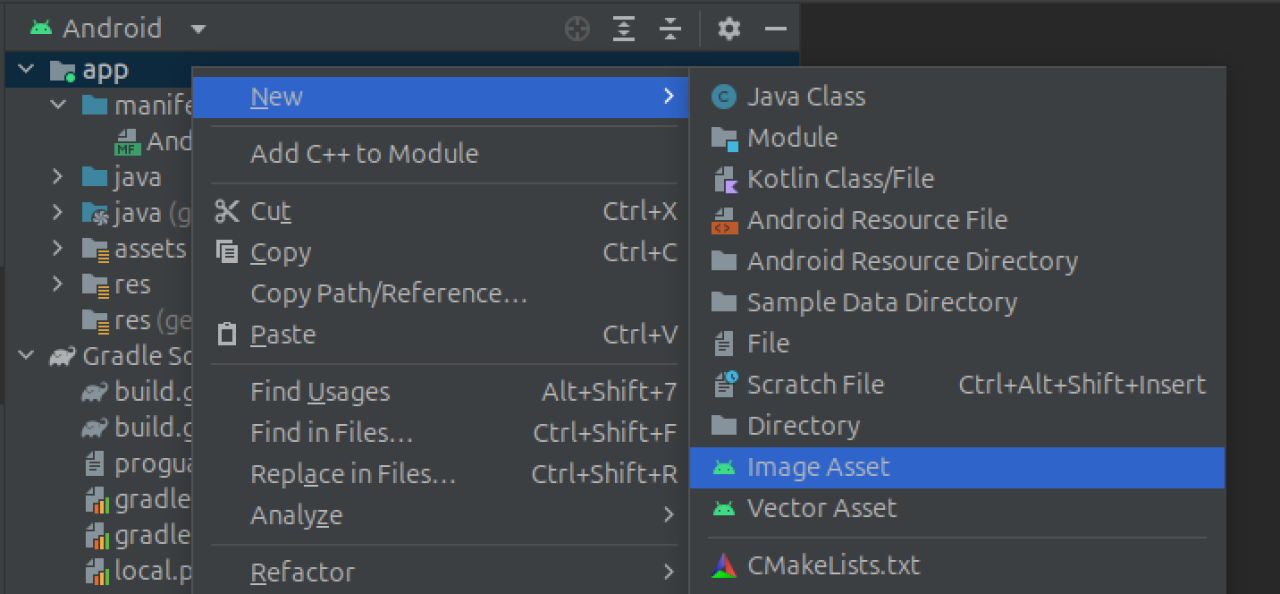
- Select New > Image Asset.
- In the Icon Type dropdown, choose Launcher Icons (Adaptive and Legacy).
- Click Path to browse for your high-resolution image (preferably 512x512 pixels).
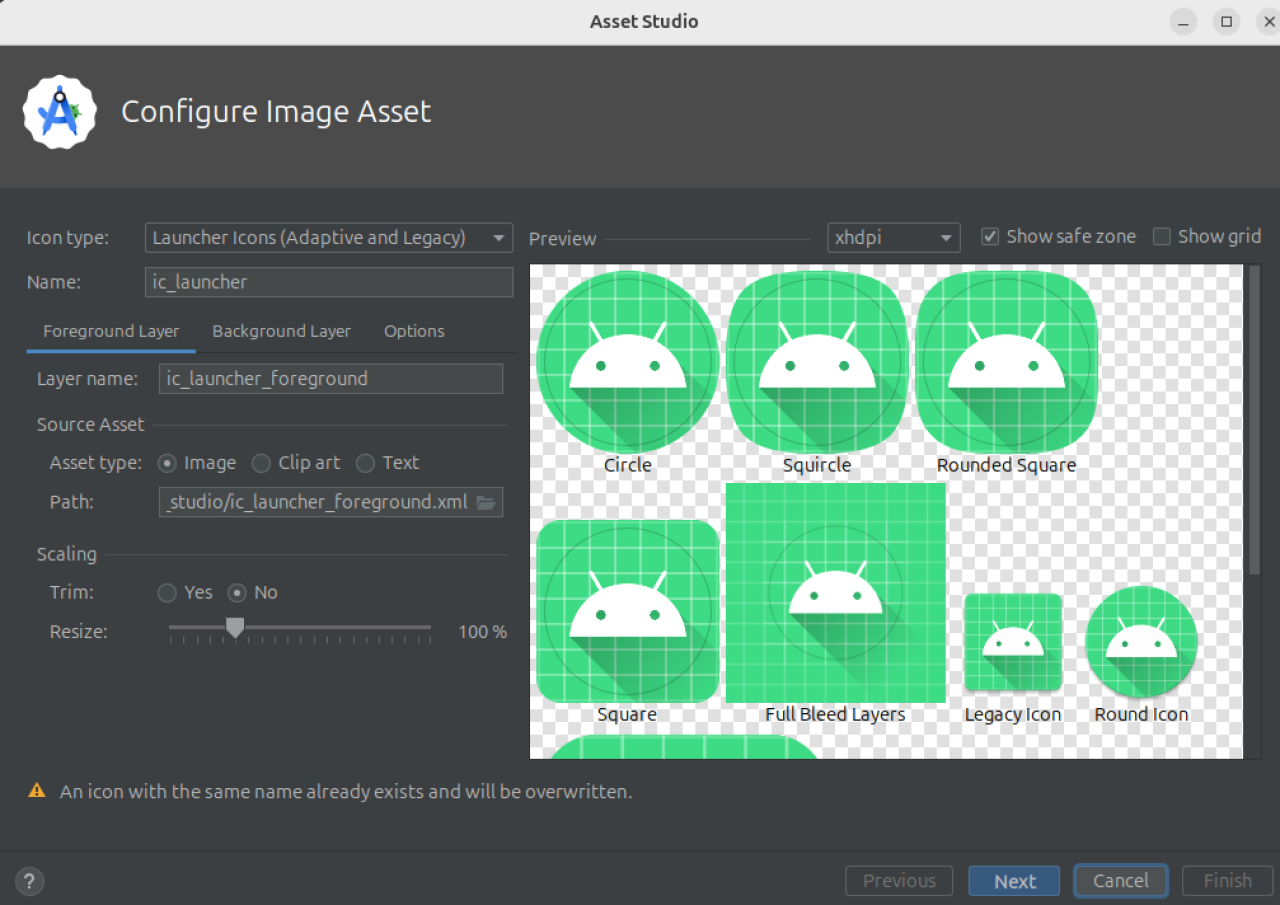
- Customize the appearance and padding, if necessary.
- Click Next and Finish. This will automatically generate the necessary icons and place them in the appropriate
mipmap-folders.
6. Run the Project
- After replacing the icons, sync and build the project by clicking Build > Rebuild Project.
- Run your app to see the new icon applied to the app on the device or emulator.